


Translations
Set up languages for your place and translate menu content automatically.
Morsly can translate your place’s content into the languages your guests use. Translations are generated automatically in the background — you review and approve them before they go live.
In this guide: Set up languages for your place, review auto-translations, and translate individual items by hand.
Before you begin: You need a place on Morsly with a menu. If you haven’t created one yet, start with Getting Started.
Set your languages
In your place’s Region & Language settings:
- Set your content language — the primary language you write your menu in.
- Add up to two additionally supported languages.
- Turn on Auto translation to have new and changed content translated automatically in the background.
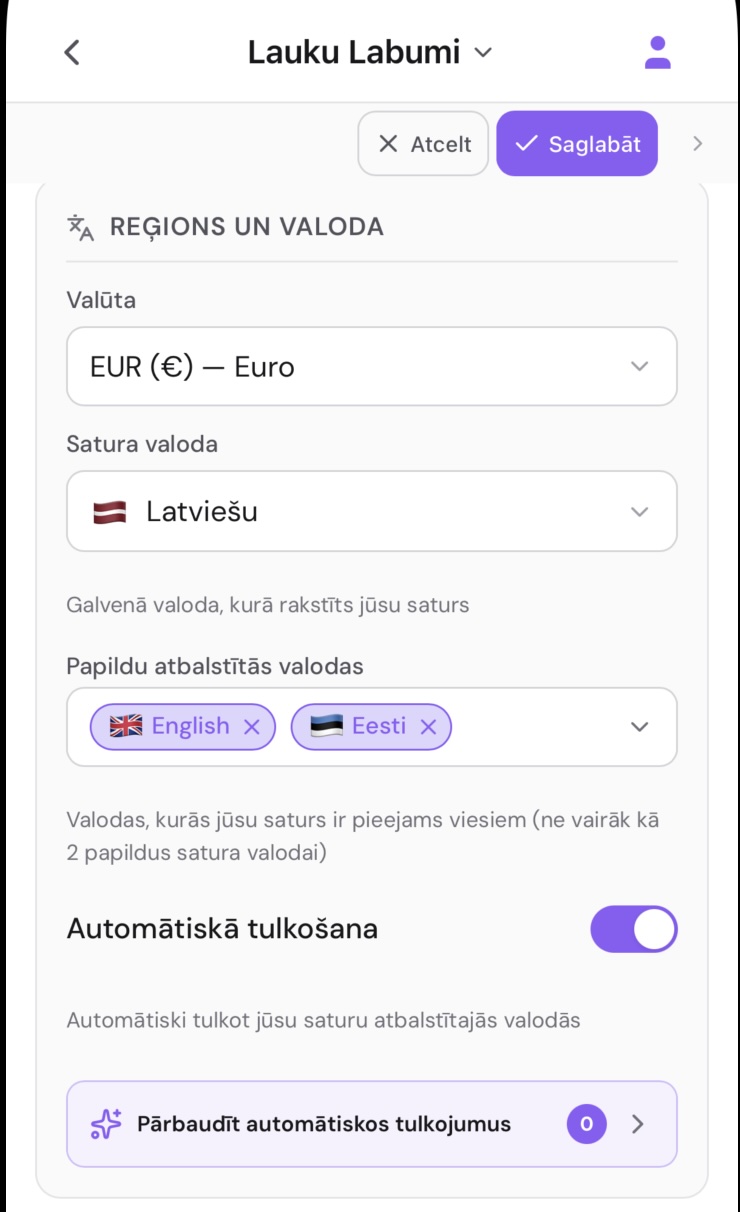
You can turn a language off later without losing its translations — disabling just hides it from guests. Deleting a non-default language instead permanently removes its translations and can’t be undone.
Review auto translations
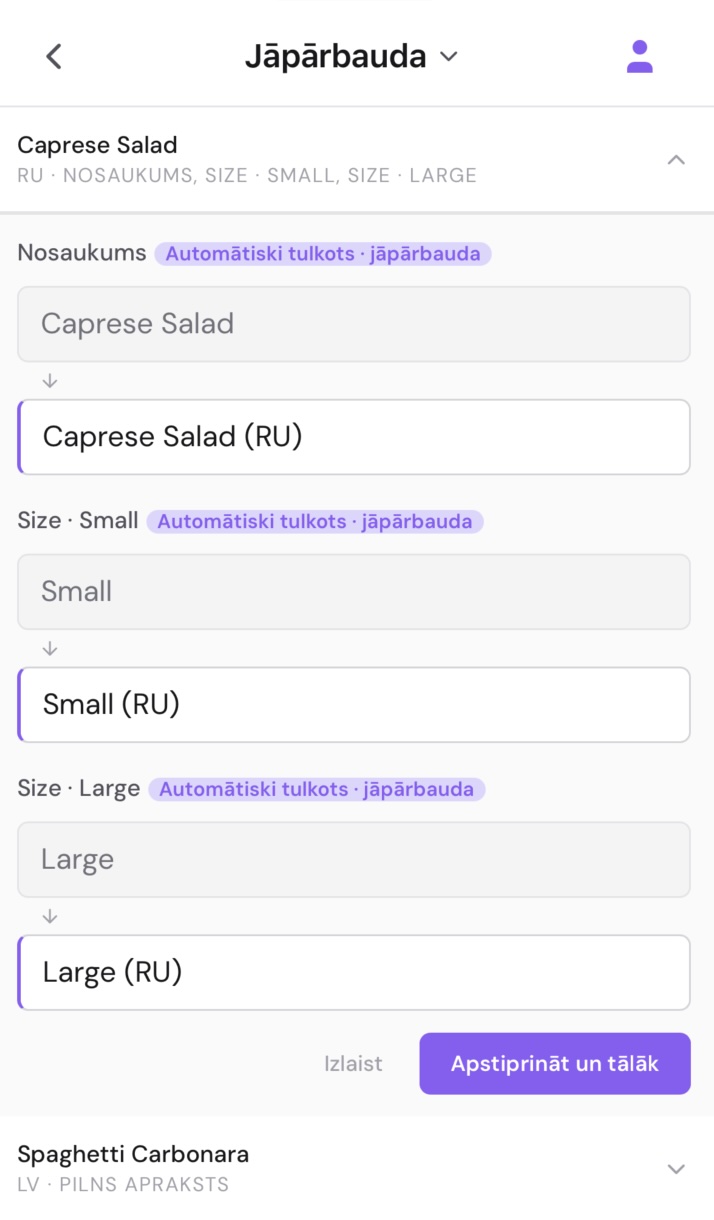
Auto-translated text isn’t shown to guests immediately. It lands in Needs review, reachable from the language settings — the badge there shows how many items are waiting. Open it to check each translation and approve it before it goes live; automatic translation is accurate for most standard menu text but can miss local idioms or dish-specific terms.
Per-item translations
You can also translate an individual item without touching the rest of the menu: open the item in edit mode and use Translate to edit its text in each language directly.
This video may show an older version of the interface.
Best practices
- Review before approving, especially for dish names and descriptions with local or cultural meaning.
- Keep item names short in every language — long names wrap awkwardly on small screens.
- If a name should stay as-is (a brand name, a culturally specific term), leave its translation empty — guests will see the original.
Related guides
- Menu Management — add and edit items to translate
- Getting Started — create your place and set up your menu
Frequently asked questions
Auto-translate isn’t running. What’s wrong? Check your Region & Language settings. Make sure Auto translation is turned on and that you’ve added at least one additional language.
A translation looks wrong. How do I fix it? Go to Needs review from your language settings and edit the translation there. If the item was already approved, open the item in edit mode and use Translate to correct it.
Can I remove a language I added? Yes. You can disable it (hides translations from guests but keeps them) or delete it (permanently removes all translations for that language). Deletion can’t be undone.
Do I need to translate every item? No. Items without translations show in the original content language. This is useful for brand names, culturally specific terms, or dishes that don’t need translating.
What happens to translations when I edit an item? If auto-translate is on, the updated text is translated in the background and lands in Needs review for approval. Existing translations you edited by hand are not overwritten.
Need more help?
If you run into something this guide doesn’t cover, reach out through the Contact page.